Table of Contents
To fix blotchy wood stain, you must remove the bulk of the affected wood stain by sanding back and then re-applying 2-3 coats with regular sanding in-between.
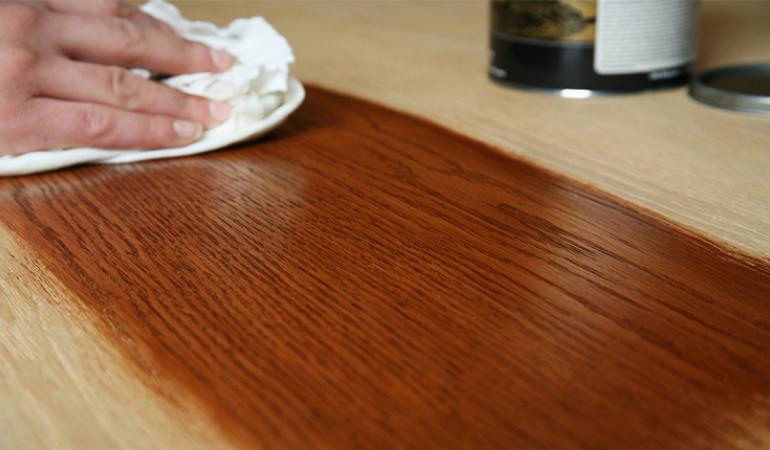
You’ve spent a lot of time creating your latest masterpiece and now comes the finishing touch; staining your wood.
But when you’re done, you notice that things are from even and there are some nasty blotches within the stain. How did this happen and what can you do about it?
Well, the good news is that it can be fixed. However, it’s also worth taking some additional steps to make sure that you aren’t faced with this problem again.
In this guide, we’ll be showing you how to fix blotchy wood stain and how to prevent it from happening again.
Why Is My Wood Stain Blotchy?
There’s very little use in attempting to prevent or fix blotchy wood stain if you don’t understand how or why it happens in the first place.
Wood is a porous material and as such, when you apply stain, it will quickly soak into the wood. But since one piece of wood doesn’t have uniform density, you’ll notice that the stain is absorbed at different rates. The result? Blotching.
How severely your wood stain blotches will largely depend on the type of wood you are using. For example, some woods like walnut and oak are very reliable and will soak up the stain quite evenly resulting in fewer problems. But when it comes to working with spongier woods such as maple, pine, cherry and birch, things aren’t always as even.
Try as you might to ensure you carefully apply your stain, there are times that you simply cannot avoid a less than uniform result.
Step By Step – How To Fix Blotchy Wood Stain
While it is sometimes unavoidable to end up with blotchy wood stain, there are things you can do about it. Of course, it pays to be as careful as possible when applying the stain but if you find yourself in a pickle, the following steps will help you to ensure a smooth, even finish and a piece that you can be proud of.
Step 1:
Depending on how blotchy the wood is, you may need to remove all of the wood stain. In other cases, you may only need to remove the worst affected areas. Make an assessment and then move on to stripping the stain.
Step 2:
Next, you will need to use Shellac which you will apply to the wood as a wash-coat. Allow this to dry thoroughly before sanding it. You’ll want to use a 320 grit sandpaper for this but don’t go in too heavily. Sand very lightly and take your time.
Step 3:
Once you’re done sanding, you’ll want to find a brown glaze. A lot of people choose a burnt umber as this works particularly well being a much warmer, redder colour than say a raw umber. Be sure to wipe off any excess. Once you do this, you’ll begin to see a more even, uniform result.
How To Avoid Blotchy Wood Stain
Prevention is better than cure or so they say and nobody wants to have to do remedial work if they don’t have to. But while there are some woods that are more likely to create a blotchy wood stain, there are still things you can do to prevent it.
No matter what approach you take, the first and most important thing is to ensure that the wood is properly sanded. You’ll want to use 220 on the end grain and 180 grit on the face. It is possible to use a random orbital sander for this but we’d still recommend finishing the job by hand.
Wood Conditioner – AKA Washcoat
The great thing about using a wash coat is that you have options. It’s possible to buy a ready-made product from a DIY store or online or you can make the wash coat yourself.
This is done by mixing mineral spirits and varnish. When doing this, you’ll need to mix eight parts mineral spirits with two parts varnish. In any case, you’ll get the same results.
The way that this works is that the solvent aspect of the conditional will push the varnish deep down into the most absorbent parts of the wood.
This seals them and will even out the absorbency across the whole piece of wood. In short, these areas won’t soak up as much of the stain as they would without this treatment.
There is, however, a disadvantage to this in that those areas that have been partially sealed don’t give the stain as much to adhere to.
This means that the end result may be lighter than you expected. You might also find that you need to go through a bit of trial and error to get the best results.
We would recommend going for an oil-based conditioner as this can be used underneath all kinds of stain regardless of their base. Just remember to allow your wash coat to dry completely before adding the stain on top.
Oil-based conditioners will need to be left overnight. Depending on the brand, the instructions may tell you that you can put the stain on sooner. However, we wouldn’t recommend this as there is a chance that this will damage the conditioner, reducing its effectiveness.
The result will be blotchy wood that you’ve been trying to avoid.
Gel Stains
Another way to try and prevent blotchy wood stain is to use a gel stain. Before doing this, you will need to make sure that you have correctly prepared the surface of the wood.
This involves wiping it down thoroughly using mineral spirits as well as checking for any areas that are scratched or otherwise imperfect. If you notice anything, get rid of it by sanding before you do anything else.
Once you’re happy with the state of the wood, you can apply your gel stain. If you wish, you can apply a conditioner as we talked about in the previous step before doing this although it’s not really necessary.
The great thing about gel stains is that they produce a much more even and reliable result. What’s more, the colour result is almost always what you’d expect.
But most importantly, the stain isn’t as deeply absorbed and sits just in the top layer of the wood so it’s pretty much impossible for it to become oversaturated.
For the evenest results, be sure to thoroughly mix the stain before applying and add an even coat.
Conclusion
Is there anything more annoying than finishing a project only to realise that your wood stain has unsightly blotches?
If this has happened to you, all is not lost. You can use a simple sanding and glazing method to get things looking more even.
However, it’s always best to try to avoid problems in the first place and our handy tips on preventing blotchy wood stain will get you there!