Table of Contents
If you’re keen to get started on that latest woodworking project then you’ll need to make sure you’ve got everything prepared. But if you’ve got wet or damp wood, you aren’t going to get very far so before you can start, you’ll need to dry out the wood to ensure it is workable.
If you attempt to work with wood that is not properly dried out then your project isn’t going to turn out the way you had hoped. In this guide, we’ll be looking at the best ways to dry your wood at home and why it is so important to do this.
Why You Should Dry Wood Before Working With It
Whenever you take on a new woodworking project, you’re going to want to make sure that the end result is as favourable and as perfect as possible. Working with wet wood spells disaster from the word go.
When wood is cut from the tree, it is naturally full of moisture. Over time, this moisture will dry up and as it does, the wood will begin to change shape. Wood contracts and distorts as it shrinks owing to the cells inside the woord changing shape as moisture leaves it. If you attempt to work with wood that is too wet or damp then it will dry as you are working with it or once the project is complete. The end result will be a piece that is warped and cracked.
The mistake that many new woodworkers make is not giving the wood long enough to dry; it’s a lengthy process so you need to be patient. They may believe that it has dried for long enough and get to work only to realise that they didn’t wait long enough as joints begin to warp and crack. There’s not a lot you can do at this point, it’s unfortunately too late and you’ll have to start again.
But understanding how wood dries and the importance of waiting for it to do so will help to avoid situations like these. It’s not expensive or complicated to dry wood but as we said, you may need a little patience.
How Fast Does Wood Take To Dry Naturally?
Generally speaking, any woodworker will tell you that lumber takes around a year to properly air dry. But there are some significant variations on this. For example, certain woods, like white oak, are completely resistant to moisture and this is why it is often used to make outdoor furniture. But other types of wood are much more porous and may require more time to thoroughly dry out.
You’ve also got to take into account a huge number of other variables that may affect how quickly (or slowly) the wood dries. For example, the thickness and density of the wood, how much moisture was present at the beginning of the drying process, what the conditions are like and how the wood is processed.
While these things can affect the drying time, keeping that one-year timeframe in mind is a good place to start. You can then assess everything else and give yourself a clearer idea of how long it’s going to take.
When processing green wood into boards, you’ll often see the wood being kiln-dried which vastly speeds up the process. We will look at this in a little more detail later on but for now, just understand that using a kiln to dry wood increases the control over humidity, temperature and airflow which causes the wood to lose moisture more rapidly.
How Dry Should Wood Be For Woodworking?
While wood may appear to be a pretty solid material, you must keep in mind that it acts in the same way as a sponge and will very easily absorb moisture, depending on the species, of course. You can use this idea to figure out how dry your wood needs to be in order for you to begin working on it.
A piece of wood needs to be in balance with its surroundings. In the simplest terms; the moisture content of the air needs to be equal to that of the wood. When this happens, we say that the wood has reached EMC, or equilibrium moisture content.
When deciding whether a piece of wood is dry enough to work with, you’ll want to think about the environment it is going to be used in once the project is complete. Consider the moisture levels of the room and match this to that of your wood. You won’t go far wrong using this method. Of course, you’ll want to check how dry the wood is and this can be done using a moisture meter which we will explain in more detail later on.
How to ‘Season’ Wood For Woodworking
To season wood means to remove as much moisture as possible to make it usable. This is normally a term you would hear when drying out firewood but it applies in woodworking too. Before you do anything else, you’re going to want to make sure that you have a wood moisture meter. This is a tool that allows you to check the moisture level of the wood.
How To Check If Wood Is Dry Enough
You will need to test the wood in order to determine whether it needs to be dried in the first place. If you have cut your own lumber then you’ll definitely want to dry it out but sometimes, even when you buy wood, there is a chance that it’ll be too damp so get into the habit of testing it first.
A wood moisture meter features two probes made from metal which you place on the wood. These will detect the moisture content of that piece of wood and display it on a screen. Typically speaking, the moisture level should not exceed 7% when looking to use the wood for a woodworking project so if it comes in above this then you’ll need to dry it out. Of course, the length of time this takes will depend on just how wet the wood is so refer back to what we discussed earlier.
It can be tempting to rush the drying process if you are in a hurry to use the wood. What if you’re making a gift for a special occasion or are in desperate need of that new dining table before Christmas? However, it’s essential that you give the wood enough time to dry or you’ll face a warped and cracked end product and nobody wants that!
There are two different types of moisture meter, the pin-type device that we have briefly discussed and a pinless device.
Pin moisture meters have probes that can be slightly inserted into the wood and these work using electrical resistance as a way of measuring the moisture levels of the wood. If you think back to those science lessons in school, you’ll remember that wood does not conduct electricity while water does. So, when there are high moisture levels in the wood, there will be no resistance which is why this is such a reliable method.
When using this type of meter, we would suggest using a single piece of wood but taking several readings on different areas. The more deeply the probes penetrate the wood, the more accurate the reading will be.
On the other hand, a pinless moisture meter does not penetrate the wood but instead, they have a sensor that makes contact with the surface of the wood and takes readings that way. You might think that this wouldn’t give as accurate a reading, but you’ll generally find that they are able to read down to around half an inch so they’re good for thinner pieces of wood. What’s more, this type of meter will give readings more quickly but if you’re looking for pockets of moisture, it may not be quite as effective.
Steps For Drying Wood
Once you have taken your readings and are safe in the knowledge that your wood needs to be dried out, you’ll need to use the most appropriate method. Later we will look at ways you can speed up this process but let’s start by looking at the most basic and effective way of air drying wood.
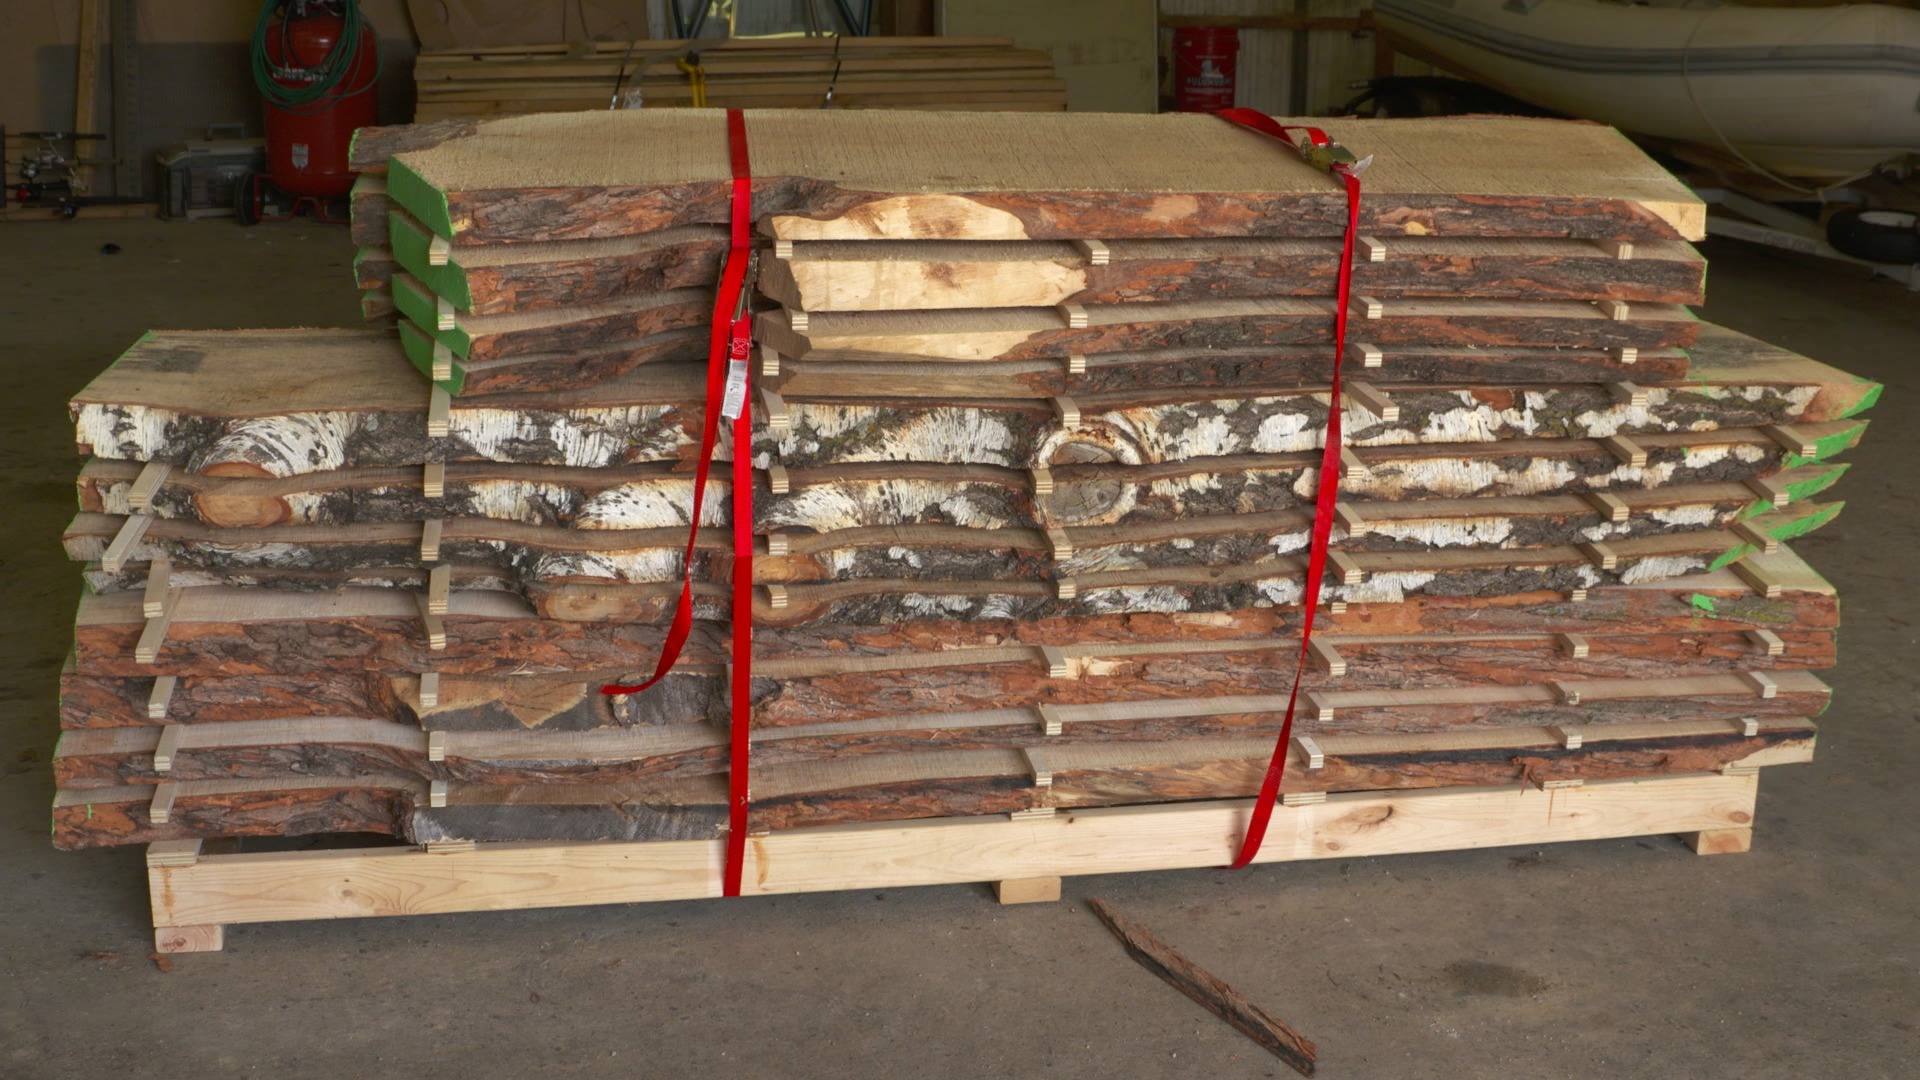
- You will need to start by laying down a row of stickers on the floor. You can use dry pieces of wood that you won’t need and place them at 16-inch intervals. The idea of this is to ensure that the wood you are drying isn’t in direct contact with the ground. This will allow air to circulate and will prevent any ground moisture from getting into the wood. Be sure to use enough stickers to fully support all of the wood you’re going to dry.
- Next, begin stacking the wood that needs to be dried on top of the sticker. You’ll do this in layers but be sure to lay the wood to be dried perpendicular to the stickers. Also, don’t forget to leave a bit of a gap between each piece to allow for air circulation. This doesn’t need to be huge; around an inch will be sufficient. Failing to do this will mean that the wood takes longer to dry as air cannot reach all parts of it.
- Once the first layer is down, you will now need to create another layer of stickers. It’s very important not to stack damp wood on top of damp wood, again this won’t help the drying process at all. You can stack as many layers as is safe to do so but it’s imperative that you use stickers in between each one and maintain the perpendicular pattern.
- When the stack is complete, you’re not quite finished. The next step will be to weigh it down. This creates a good deal of pressure on the stack and will prevent the wood from warping which it will naturally do as it dries if you miss out on this step. You can use bricks or breeze blocks; anything you have to hand as long as it’s weighty enough.
- You’re also going to need to protect the wood from the elements if you are drying it outdoors; otherwise, when it rains, you’ll be back to square one. You can use a large piece of plywood on the top of the stack which will be more than enough for the job.
Provided that you follow these steps to the letter, you will find that the wood dries out pretty quickly. Of course, you will need to keep in mind that the conditions outside will determine how quickly that is. Going through this process in summer when things are warm and dry will mean the wood dries substantially more quickly than it would during a cold, wet winter.
Methods For Speeding Up The Drying Process
The above method is the best way to dry wood at home without the need for any expensive equipment but if you’re in a hurry to use the wood then it might take too long. But not to worry; there are a few things you can do to speed up the process and be able to use the wood much more quickly.
Kiln Drying
Kiln drying wood is far faster than air drying and when using a good quality kiln, you can reduce the drying time down to six to seven days. This is because of increased airflow and higher temperatures and is typically how commercial users would get the job done. Moreover, using a kiln will ensure that the wood dries more evenly, reducing the chance of moisture pockets deep within the wood that you may not notice until it’s too late. Because of this faster and more even drying, you will also find that using a kiln produces wood with fewer defects.
However, that isn’t to say that kiln drying is the perfect solution because it isn’t without its faults. One of the biggest disadvantages to this method is that the kiln may cause internal stress to the wood which is more of a risk when not using the correct type or quality of kiln. This is known as case hardening and occurs when the outer part of the wood dries more quickly than the internal part. When this happens, and the inner core begins to dry down the line, it may stretch before shrinking which leaves the wood defective. At worst, the core will honeycomb, or split, rendering the wood completely useless.
That said, a great advantage of using a kiln is that the high temperatures will rid the wood of any pests or parasites such as powderpost beetles which could really damage it. But you must be careful when choosing which species of wood to dry in your kiln as those elevated temperatures may also cause the appearance of the wood to deteriorate. This happens with things like black walnut which will come out of the kiln looking far less vibrant.
Choose The Right Location
Many people are forced to dry their wood outdoors because of a lack of indoor space to do this. If this is the case, then all is not lost and your wood will dry outside provided that you find the best location. Choose a spot that gets a lot of natural sunlight as this will boost the drying process. Moreover, it is a good idea to choose a place where the wood will be exposed to as much wind as possible.
That said, these exposed locations will also leave the wood open to being exposed to wet weather so you’ll need to weigh up the pros and cons and make sure that this won’t be a problem. It’s better to put it somewhere with less wind exposure if it means that it’ll be protected from the rain as well. Of course, using a cover will provide adequate protection from additional moisture so don’t forget this step.
Drying Wood Indoors
When choosing the best location to dry your wood, it is worth taking a look to see if you have any available indoor space as this is far preferable to leaving the wood exposed to the elements. Some people have outbuildings like sheds, brick buildings and garages which are ideal for this. Even better if you have some form of heating in the structure to raise the temperature and speed things up.
But if you don’t have heating in these rooms then it is still better to keep your wood inside as the simple shelter from the rain will be enough to dry it out more quickly.
Boost Things With Appliances
Who said that being a modern woodworker wasn’t easy? The great thing about this is that we have access to so many different tools and appliances. If you want to give the drying process a real boost then you could stack the wood indoors and whack on the dehumidifier. All you need to do is place it next to the stack and let it work its magic.
What’s great about this is that you could reduce the drying time by month so if you’re in a rush to use the wood, this is worth a shot. These appliances are literally designed to suck in moisture so what better way to go?
You might also use a fan in the room where the wood is being dried to further speed up the process. You can use each appliance separately and get good results but combining the two will certainly be the best option. The dehumidifier will remove the moisture while the fan will improve the air circulation; both things that wood needs to dry!
Now, if you only have some small pieces of wood to dry out and you want to get the job done quickly then you could use a microwave. In industrial settings, they have huge microwaves that can take large amounts of wood but it’s unlikely that you’re going to want to invest in one of these at home; unless you’re running a decent sized business, in which case, you might.
However, for us regular folk who simply enjoy a bit of woodworking at the weekend, you can use a standard microwave. You’ll only be able to use pieces of wood that will fit, of course, and it’s important to be careful when doing this as not doing it correctly could cause the wood to become scorched which will make it effectively useless.
Take your time and microwave the wood for no more than two minutes at a time. If it’s any thinner than an inch and a half, I’d do it for even less time. In between blasting it in the microwave, have your moisture meter to hand so you can stay on top of things and know when it’s time to stop.
Conclusion
Trying to use wood for a project that has more than 7% moisture could lead to the wood warping and cracking as you work on it. Nobody wants this for their latest project so it’s very important to make sure that you thoroughly dry your wood before using it.
This can be a time-consuming process but it’s worth it to save wasting wood and your hard-earned money. Stacking the wood using a sticker system is the cheapest way to get the job done but it’s also the longest. If you’re in a hurry, there are some ways to speed up the process such as using a dehumidifier, microwaving the wood or investing in a kiln.