
Table of Contents
Drilling is a complicated topic and it can be difficult to know where to start. There are many types of drill bits and different materials that you will need to drill through, so how do you know which bit is the best for your project? The answer is surprisingly simple: ask an expert! I’m not talking about asking someone at B&Q or Screwfix (though they might have some helpful information), but rather going straight to the source.
In this blog post, I will hope to show you the tips and techniques that I have picked up over the years so that hopefully you will be able to learn a trick or two!
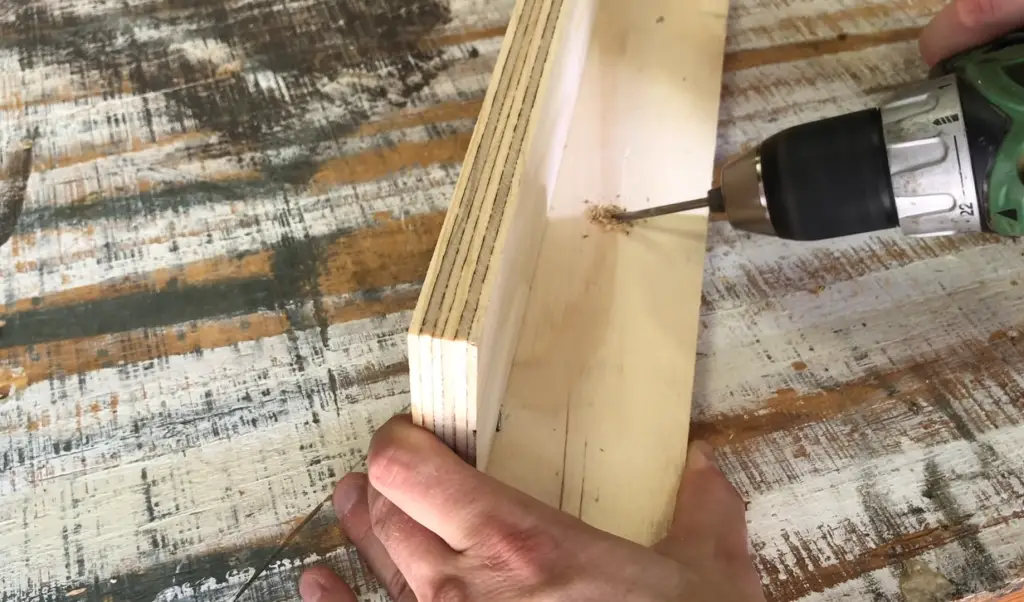
Pre-drilling is always a good idea before you drive a screw. Pre-drilling removes some wood and gives the screw some room to enter the material. This prevents splitting and makes driving the screw easier. Also, I’m only using an electric hand drill, not a drill press but a good number of these tips can apply to a drill press and they’ll even help if you have to drive a screw by hand so keep that in mind.
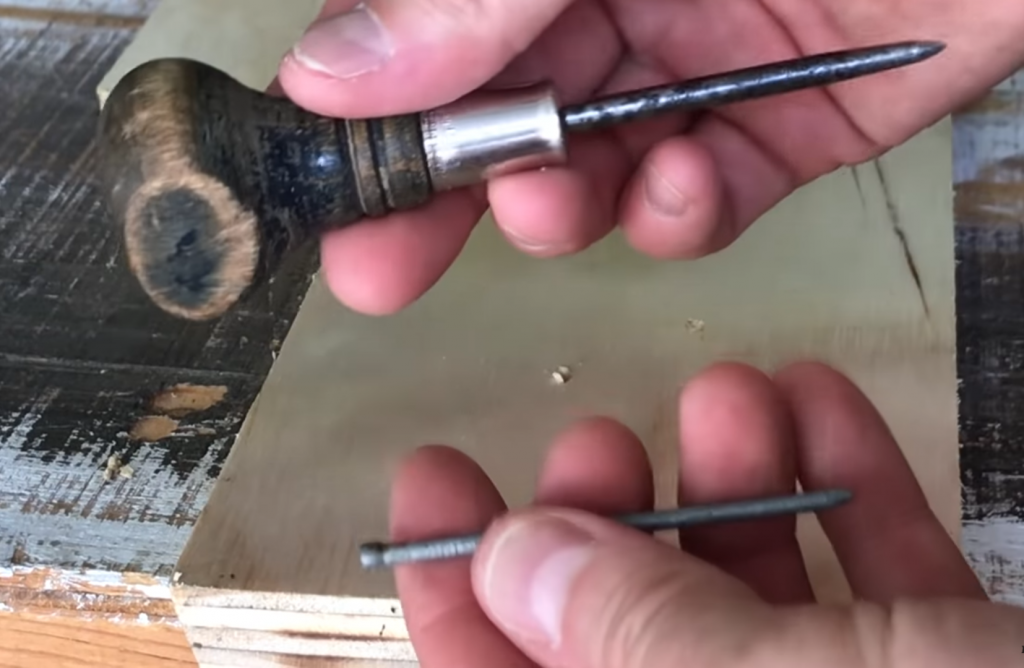
Tip 1 – Start with a punch
Drill bits Have a tendency to wander when they’re getting started. This is because of their spinning motion in the shape of the drill tip so in any situation where I need a very precise hole placement, I start by punching the hole location. You can do this with an awl, a nail, or even just a sharp trim nail.
I’ll typically mark the exact location with a pencil then place the tip of my punch right there and give it a little tap. This creates a perfect place for the drill bit to bite into and get started without wandering.
Tip 2 – Don’t use too much force
Drill bits, like saws, should really be able to do their job without too much force. The bit is designed to cut its way through the material, you just need to apply constant pressure. Skinny bits in particular should never be forced because they can break fairly easily.
If a drill is really fighting you it’s probably a sign that the bit is dull. Think about changing it out for another drill bit or think about trying the next couple of tricks.
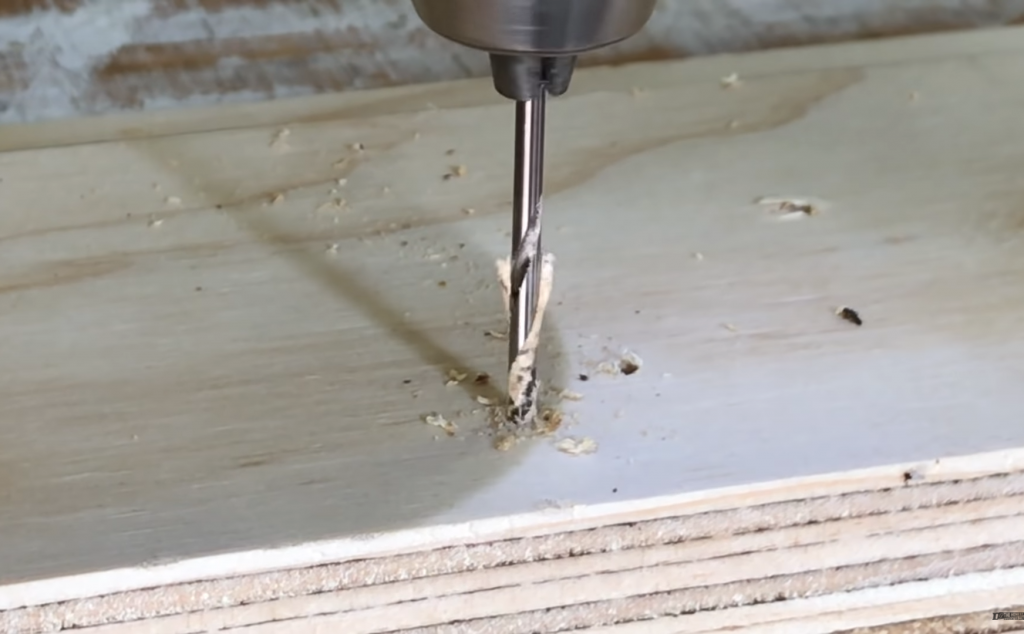
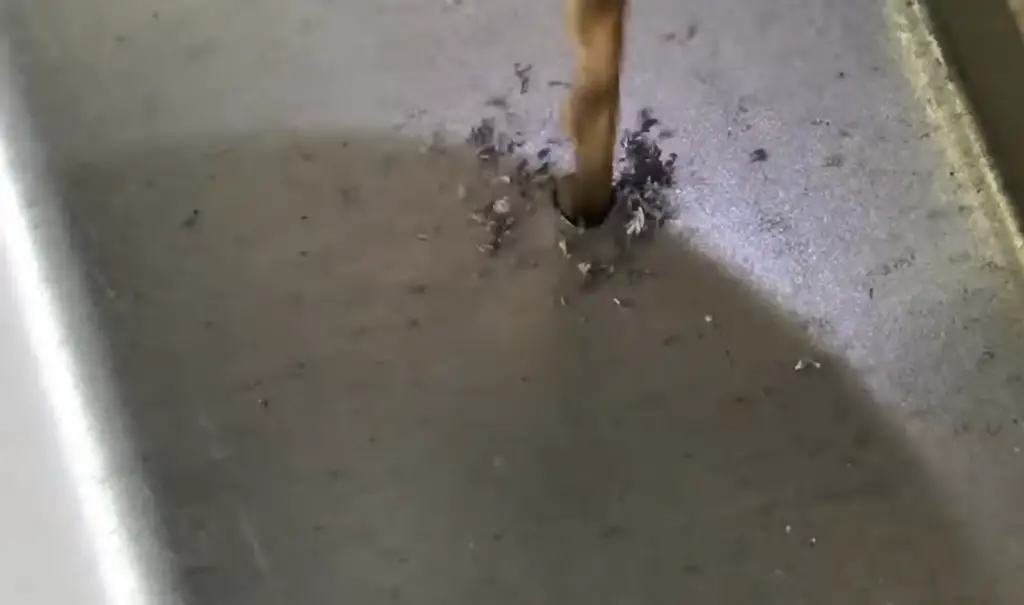
Tip 3 – Clear out the swarf
Drill bits are designed to remove wood while boring a hole. The tip initiates the cut then the flutes of a twist-bit give the wood a channel to exit through. This waste wood is called swarf (some people call them chippings, filings or shavings) which it’s one of those old-fashioned words. The problem is the drill bit can’t always clear the swarf when the bit is embedded. The bit basically becomes a smooth cylinder and it can’t cut effectively. If it does this, you need to back the drill bit out periodically to remove the waste wood.
Sometimes, if the wood is wet or really sappy you may even need to push the swarf out with a knife or your fingernail but when the swarf is clear, the bit will drill much more effectively so be sure to back the drill out often and make sure that the flutes are clear.
Tip 4 – Step up sizes
Another reason drilling may be difficult is that you’re trying to drill too big of a hole too quickly. Larger drill bits have more surface area and more material to clear. The drill is going to have to work harder to do this and it often makes a mess of the wood in the process. You can kill two birds with one stone by starting with narrower drill bits and working your way up in diameter. This makes drilling each pass easier and it also prevents your wood grain from tearing out due to excessive friction.
For holes of a quarter inch in diameter or more I’ll often cycle up through two or three different drill bits and hardwoods in particular will require more bit sizes since they are so much denser.
The next two tips further explain how to avoid tear-out when you’re drilling:

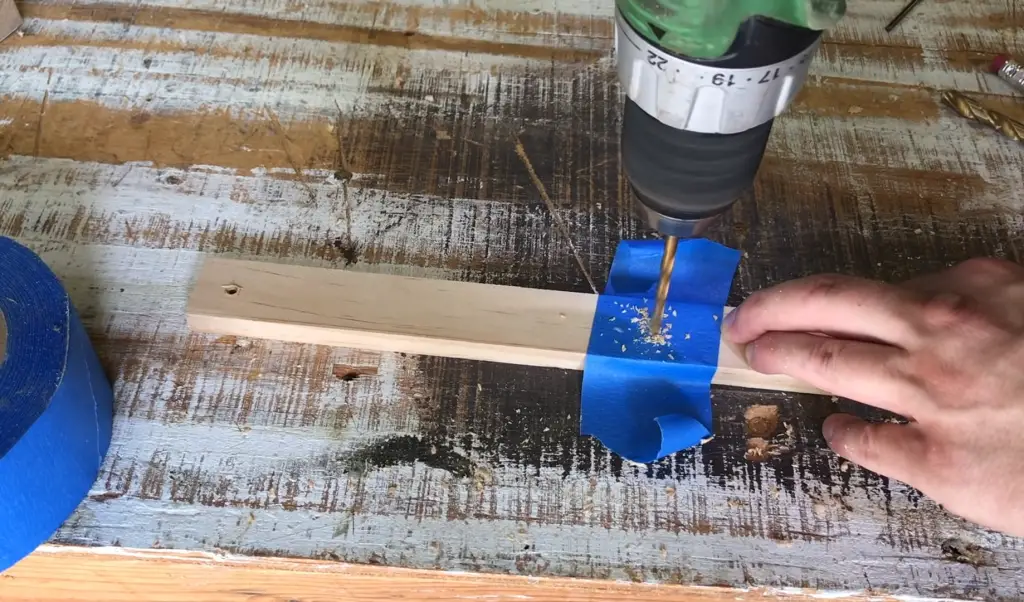
Tip 5 – Use tape to prevent splintering
Just the cutting action of a drill bit spinning can tear up wood grain and cause unsightly scarring. This tends to be even worse in soft woods like pine. If the appearance of your material matters, put a piece of painter’s tape over the place where you’re planning to drill, then you can mark your location on the tape and drill through it.
The tape adhesive will stabilise the wood grain beneath and prevent the drill bit from doing too much damage as it bores its way through the wood. When the drilling is done you just pull the tape off.
But speed also plays an important part in controlling tear-out.
Tip 6 – Use high speeds for drilling wood
Wood is a relatively soft, brittle material and the flutes of a drill bit can act as pulls that rip at wood grain when the bit is moving too slowly. When this happens, the bit is sort of ploughing its way through the material. You really want the bit to spin fast – so fast that the flutes don’t have time to grab much wood grain. Instead, the flutes break off wooden in micro bits that come away more easily. So high speeds will give you a much cleaner hole when drilling wood.
But that’s not the case for metal.
Tip 7 – Use slow speeds for drilling metal
Carpenters don’t work with metal as much as welders or plumbers but it does come up and the key to drilling metal is using slow speeds and pressure.
I know I just said don’t use too much force, but when drilling metal it does make a difference. Metal wants to carve away in cleaner scoops in wood. Sometimes it comes out in long curlicues or just little chips. If your bit is spinning too fast it won’t really be able to dig in and start scooping, it’ll just skip over the surface quickly, heating up and dulling itself doing no good.
Slow your speed down drastically and use as much pressure as you think the bit will take without breaking. The cutting tip will slowly dig in and begin gouging out material. You’ll see a cone-shaped depression forming.
Drill until you punch through and then consider letting your bit cool down between rounds of drilling.
Moving on, I frequently get asked, ‘how big should my drill bit be compared to my screw?’ There are charts out there that determine this but who’s going to stop what they’re doing to look up some engineering chart? Here’s a quicker, more convenient trick for deciding what bit diameter you should be using:
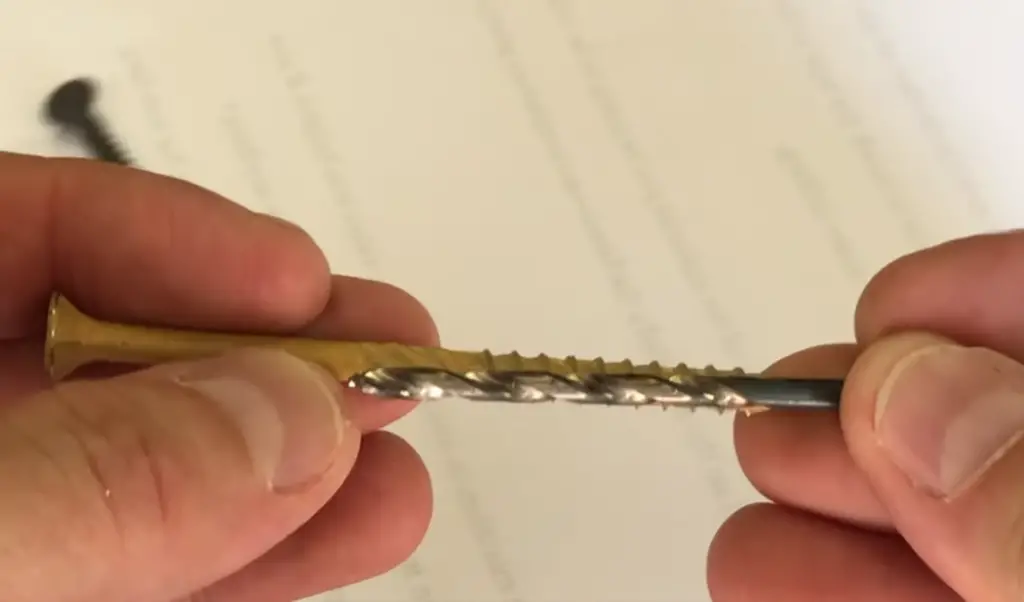
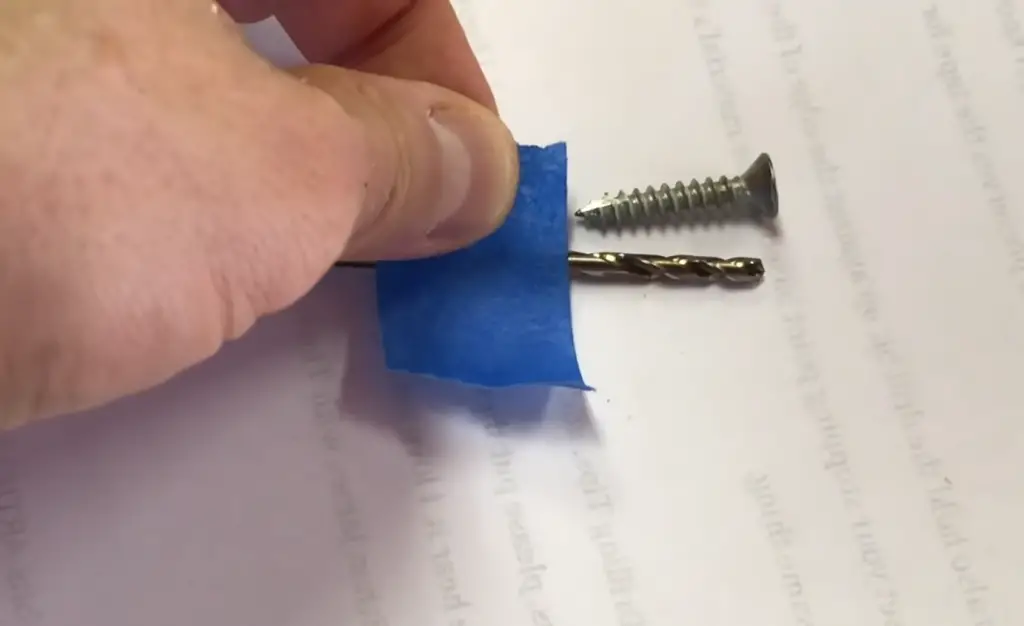
Tip 8 – The eyeball method
Take one of the fasteners you have to drive and hold it out in front of you, preferably up against a light-coloured surface to create more contrast. Now take a bit and hold it closely in front of the screw so they’re basically touching and in line with each other. Ideally, you want the drill bit to hide the shaft of the screw but not the threads. The threads are the cutting part for the screw and they carve the channels that will hold the screw in place, so you want the hole to be about as wide as the shaft of the screw but narrower than the threads.
Also, remember that hardwoods like walnut will require a slight overcompensation because there’s so much denser. You may want to change up to a slightly larger bit size to remove just a little more wood.
Now if you don’t have a larger bit the next trick might come in handy:
Tip 9 – Hogging out material
Hogging out is another construction phrase that generally means removing more material by aggressive reaming. For example, say a screw doesn’t want to fit into a pre-drilled hole but you don’t have the next size up drill bit, you can sometimes get away with running the same drill bit through the hole several times slightly enlarge it in the process
You just keep the bit spinning, working it forward and backwards making sure it contacts the walls to the hole, but trying not to angle the bit too much because this can deform the hole drastically and before you remove too much material test the screw to see if the fit is improved.
It’s very easy to overdo things this way but hogging out is a common technique used on job sites from widening holes on short notice and that includes drilling into wood, concrete metal and even plastic.
Tip 10 – Toenail drilling
Toenailing is just driving a screw at an angle, but drilling at an angle can be tricky because the drill bit wants to run around everywhere. Again, that’s just the rotary action of the tool at work. So how can you drill in an angle easily? Start by standing the tool up and drilling vertically at first. This lets the drill bit bite into the material and gets the hole started. When the tip is just slightly embedded, you can now tilt the tool down and drive at an angle.
You can carry out this tilt either when the drill is running or when it’s at a stop, but make sure you don’t break your bit in the process. If it’s already too deep. I usually keep the drill running so it can cut its new channel by adjustment.
..and finally one last tape trick
Tip 11 – Use tape as a depth marker
This tip is really important when you don’t want to punch all the way through the material you’re drilling. For instance, if you want to put a screw in the underside of a nice slab, you want to pre-drill enough for the screw depth but no more.
So try this. Set the fastener up against the drill bit with the head resting on the tip. Now take a narrow piece of painter’s tape and round wrap it around the drill bit where the fastener stops. I even leave mine a tiny bit shy of that mark. This way when you’re drilling, the tape will give you an exact indication of the depth you need and because I left that little hairline gap I know not to touch the tape to the surface but just to get it really close.
This preserves the tape for more drilling. You can also hold the drill bit up against the edge of the material you’re going to drill. You can set your stopping point based on the thickness of the material. This accomplishes pretty much the same thing.
Final thoughts
Whether you are a hobbyist or professional carpenter, there is more to drilling than meets the eye. Drilling can be tough-it requires knowledge of drill bits and materials, not just what type of project you’re working on. To make life easier for yourself (and your wallet), I recommend taking the time to consult with an expert before making any purchase decisions in order to ensure that you buy the right bit for your specific needs.
I hope you have found these tips and tricks that I picked up over my years useful, so hopefully, they will help when constructing your projects.